Bootstrap Checkbox Form
Overview
In certain cases the simplest aspects might probably get quite vital-- especially each time you come to need them. As an example just how do your website visitors interact with the webpages you generate specifying a basic Boolean act-- just yes or no relating to some of the thoughts you should request, the way they do accept the conditions and terms or maybe line up a few of the achievable options they might have. We typically surpass this without paying a lot of an interest to the component responsible for these sorts of actions still, the Bootstrap Checkbox Position is actually a pretty critical component-- one our forms can't actually complete without.
Inside the most recent fourth edition of the Bootstrap framework we are offered with the
.form-check.form-check-label<div>.form-check.form-check-label<label><input>.form-check-inputEfficient ways to employ the Bootstrap checkbox:
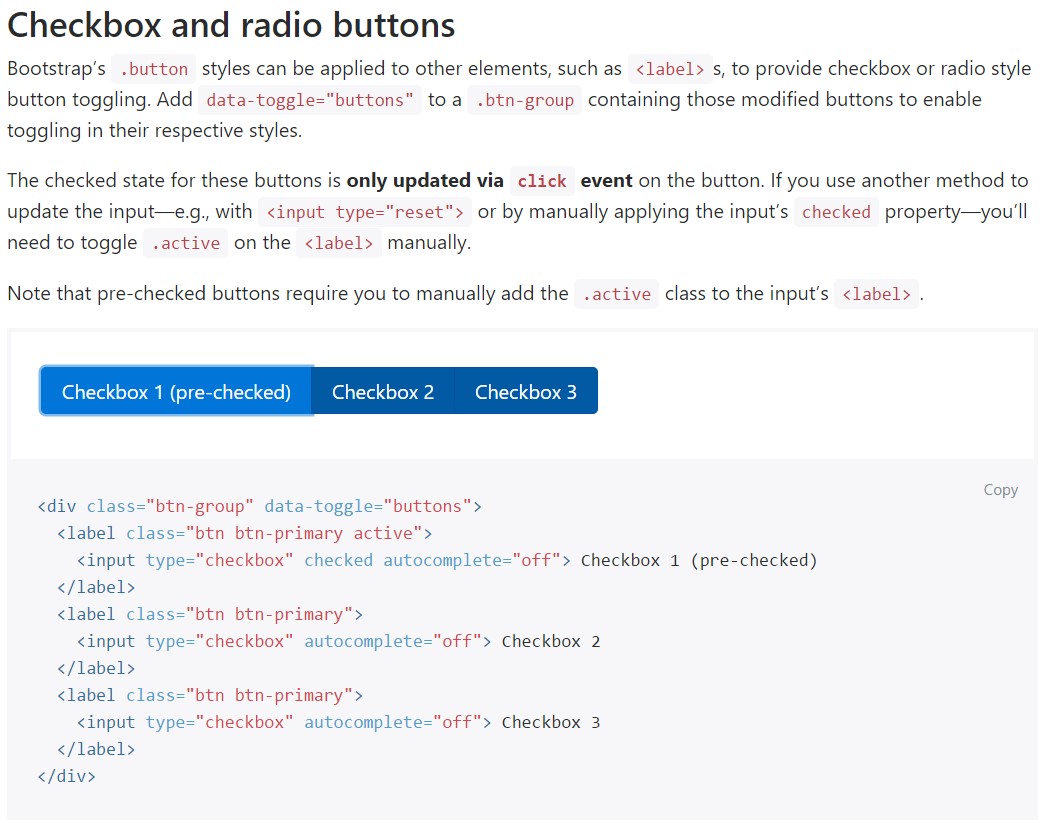
The checked state for these buttons is only updated via click event on the button.

<div class="btn-group" data-toggle="buttons">
  <label class="btn btn-primary active">
    <input type="checkbox" checked autocomplete="off"> Checkbox 1 (pre-checked)
  </label>
  <label class="btn btn-primary">
    <input type="checkbox" autocomplete="off"> Checkbox 2
  </label>
  <label class="btn btn-primary">
    <input type="checkbox" autocomplete="off"> Checkbox 3
  </label>
</div>
Once in a while we want the checkboxes to take place within our forms without the customer really being capable to get any action clicking on them-- that is really where the disabled option shows up.
Just to disable effectively a checkbox in Bootstrap 4 applying the typical HTML attribute
disabledIf you appreciate the idea and really desire to perform this you really should assign the
.disabled.form-checkOne more example
Anytime you are utilizing checkboxes, wrap all of them in a
<label>.custom-control.custom-checkboxEmploy
.custom-control-input<input>In addition utilize two
<span>.custom-control-indicator.custom-control-description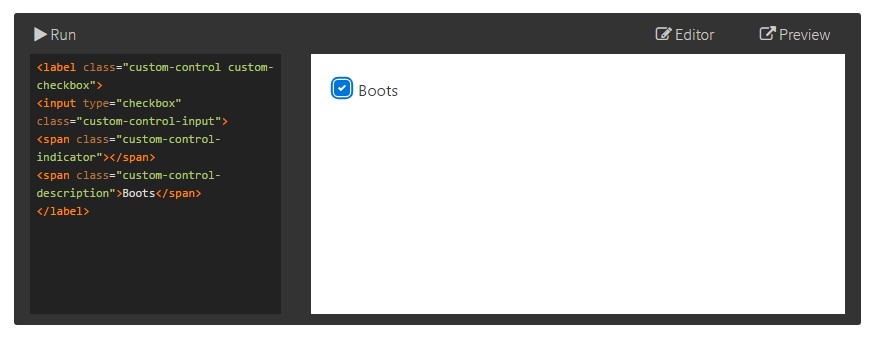
<label class="custom-control custom-checkbox">
<input type="checkbox" class="custom-control-input">
<span class="custom-control-indicator"></span>
<span class="custom-control-description">Boots</span>
</label>
Bootstrap Checkbox State forms
Default radios and checkboxes are enhanced upon with the support of
.form-checkThe disabled class is going to additionally light up the text message color to help reveal the input's state.
A brand-new aspect for the Bootstrap version 4 framework is the release of the so called custom made form elements. These are the very same elements we are familiar with inside functionality although styled far more attractive and in the Bootstrap method. By using them you can surely add in fascinating taste and personality to your material via just selecting a few supplemental classes to the controls you feature in your forms.
In order to use customized checkboxes wrap them within a
<label>.custom-control.custom-checkbox<input>.custom-control-input<span>.custom-control-indicator.custom-control-descriptionFinal thoughts
That's pretty much all that you need to handle in order to place a checkbox element for your Bootstrap 4 powered websites and add in some custom-made flavor to it adding it a tasteful appeals. And now everything you ought to do is repeat the practice unless you have actually checked every one of the checkboxes wanted are already on the web page.
Examine several online video tutorials regarding Bootstrap checkbox
Linked topics:
Bootstrap checkbox official documents
Centering checkbox buttons in Bootstrap 4 row
Make checkbox always visible in Bootstrap 4
